Saturday, July 9, 2016

Galaxy Art


I am teaching a class for summer school called Adventures in Art.  I've been working with a different theme each week to keep it interesting.  This week's theme was Space.  I came up with this super fun project on the spot and the results were better than I imagined!!!  I divided the steps up so we could work on this over 3 days.


Day 1:  Students selected painted paper from our 'store'.  We had painted a TON of paper on our 1st day of summer school and have been using it for various projects.  The paper was sorted by color and placed on a bookshelf where students could 'shop' for paper pieces.

Students traced circles on the paper and cut out a variety of sizes to use as planets.  Students were asked to make at least 1 planet with rings.  We used glue stick to glue them down to a 12" x18" black construction paper.


Day 2: Students used chalk pastel to create galaxies in the black backgrounds.  We discussed ways to smudge the chalk so that it fades into the black background.  We used a variety of blues, pinks and purples to create the galaxies.  Then we discussed how to add shadows on the planets to create spheres using the black chalk pastel.  Some students had a sun in their pictures and others did not so that provided a unique opportunity to teach shadows with a light source.  Students who had suns in their pictures used yellow chalk pastel around their suns to create a glow effect.


Day 3: We added stars on the final day.  We looked at images from space and noticed that there were tons of tiny stars and a handful of larger stars in the images.  Students used toothpicks and white paint to create the tiny stars and cotton swabs to make the larger ones.  This step only took 20 minutes max so students worked on another small project afterwards.


Happy Creating!!!!!


Photobucket

Friday, July 3, 2015

Saying goodbye and saying hello...

After 4 wonderful years teaching in Stoughton, I had to say goodbye.  A position opened up in our city and applying for the new job was one of the hardest things I've had to do.  I absolutely loved my school in Stoughton.  So much so that I had my two daughters do the commute with me so that they could attend school there as well.  It was a wonderful, beautiful building full of amazing staff members and friends.  I will forever cherish my memories there.

Melanie and Amelia's last day of 2nd grade and last day at Sandhill
In my new teaching position I will be working only a few minutes from my house which is a HUGE perk after doing a 40 minute commute (in WISCONSIN on back country roads!!) for 4 years.  I am really excited to finally be working in my community!  It's been so great to see so many familiar faces in the schools again.

I will be teaching at Barrie Elementary and Rockwell Elementary.  Both schools have art rooms in the basement, BUT I DO have windows in both rooms!  The space in both rooms is nice and storage is ok.  Everything will be a bit of an adjustment as my former room was HUGE, had 4 sinks, a GIANT walk in store room and a separate room for clay.  Both of my new rooms have only 1 sink and it's in the store room, so learning to work without a sink will be an adjustment.

I was pleased to see that I have smartboards and document cameras in both my new rooms!  YES!!  And both rooms have some nice features that I'm excited to work with.

My most favorite thing?  I GET TO PAINT my walls!!!  I was never allowed to paint the walls in my former classroom at my principal's request.  I have been having a blast painting all week at Barrie which was almost completely white save for one green wall. 


Cheers! I'll post my progess pictures up as I get finished with certain areas!  I'm so thrilled to finally make my art rooms my own.   These will be my 'forever' rooms.


Photobucket

Thursday, May 14, 2015

Weaving Makes the World Go 'Round

This year was the first time ever where I had the entire school weaving at once!  For some reason it had never worked out in the past.  I created a framework for the type of weaving each grade level would be doing according to our curriculum.  I've decided to keep the lessons the same (for the most part) each year so that as kids get older they can look forward to doing the more advanced lessons.

Kindergarten and 1st Grade did paper weaving.  The crocodiles were a cute themed project and the kids LOVED them.


 2nd graders learned to weave on a loom....


 3rd graders created spiral weavings on foam plates (Styrofoam is a lot sturdier than paper plates!!)


 4th Grade removed the weft from burlap and wove back into the warps... very fun.  They also got to practice some embroidery stitches.


And 5th grade created these fun coil baskets (less weaving, more wrapping).


The 2nd, 4th and 5th grade projects took up to 4-5 50 minute class periods whereas the K, 1st and 3rd were done in 2 classes.

Good luck and happy weaving!
Photobucket

Tuesday, July 2, 2013

more projects done!

Students finished up their containers today and started on the new lesson:  coil containers using slump molds.  

Students could choose from either a bowl or a cup and create a design using coils.  The bowls or cups were later removed by me and the paper towel will burn up in the kiln leaving a delicate vessel.

Very cool and challenging project!


Photobucket

Monday, July 1, 2013

Summer School Session 2: Off to a bang

We are now into the second two week session of summer school.  With my new group of kiddos we started out with the bird bath project again- it's such a fun and cute project.  On day two I showed the students two different ways to make a container.  

One way was using rectangles and squares to create a box and the other way was to connect a long rectangle together to create a cylinder.  Both techniques use the slab rolling construction method. 

We used rulers and rolling pins to help keep our clay slabs an even thickness.  We went through a ton of clay!

Some students choose to create mugs so they added handles instead of lids which was a nice personal touch.  :)

Tomorrow's project: Coiling.


Photobucket

Monday, June 24, 2013

More summer school session 1 pictures


Today I unloaded both huge kilns full of bisqued pottery (clay that has been fired one time).  We had a big glazing party and the students got to glaze all of their stoneware projects.  We did have a few mishaps in the kiln and some of the projects broke or blew up.... these things happen sometimes when air bubbles get trapped.  :(  The students were all really great sports about it!!

Tomorrow we'll glaze a few more pieces and get everything fired.  Here's a few pictures to enjoy.


My view this morning- clay is a white color after firing.


 PRETTY!  Glazed pieces loaded into the kiln and ready for firing!

 These glass gems will melt and look like 'water' in our birdbaths!  :)

Photobucket

Wednesday, June 19, 2013

Summer school session 1: Days 1-3

I am teaching Beginning Ceramics for summer school again this year!  The first few days have flown by!  I have 3 amazing sessions of students grades 2-5.  They are all hardworking students and have been very enthusiastic about the projects so far.

On Monday we reviewed the pinch pot method and created two small pinch pots, joined them together and created minature bird baths.  They are so cute and I love all the extra detail the kids added.  So many of the students added tiny clay birds and some even put vines with leaves climbing on the pedestles. 


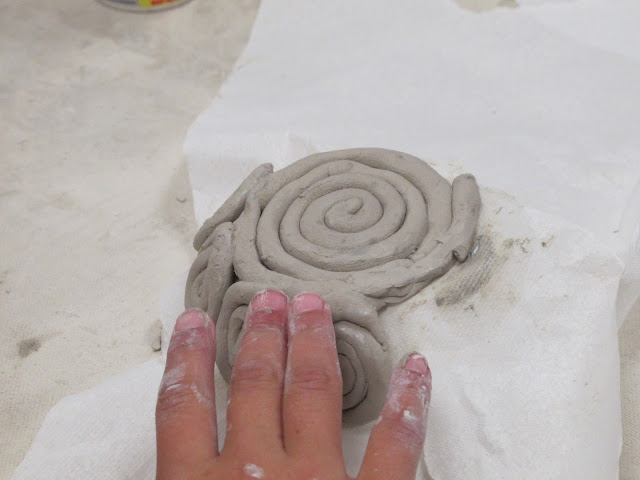
On Tuesdays we went over the coil method and used clay coils to create turtle shells.  Students then created a body with head, legs and tails.  Many of the students left the shells detatched so that they could hid small objects under the shell.


Today we went over how to roll out clay slabs.  We use rolling pins and wooden rulers to help keep the clay an even thickness.  From the slabs we cut rectangles to create mugs.  Students added texture to the slab before shaping it into a cylinder.  Bases and handles were added.  It is fun to see the variety of shapes and sizes with the mugs!


 Tomorrow is Thursday and we will wrap up using the stoneware clay so that it has enough time to dry out.  I'm hoping to get these items in the kiln tomorrow or Friday...fingers crossed everything dries in time!!

Right now everything looks all grey... next week we will have a kaleidoscope of colors once we begin to glaze and/or paint our pottery!
Photobucket